Using the Notice dashlet, you can display your Company’s logo on your site dashboard for all members to see when they log in, along with any instructional text/additional information they may need.
To begin with, you will need to add the ‘Site Notice’ dashlet to your site dashboard.
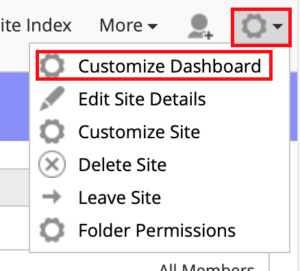
This can be done by navigating to the site dashboard, clicking the gear wheel at the top right and clicking ‘Customise Dashboard’.

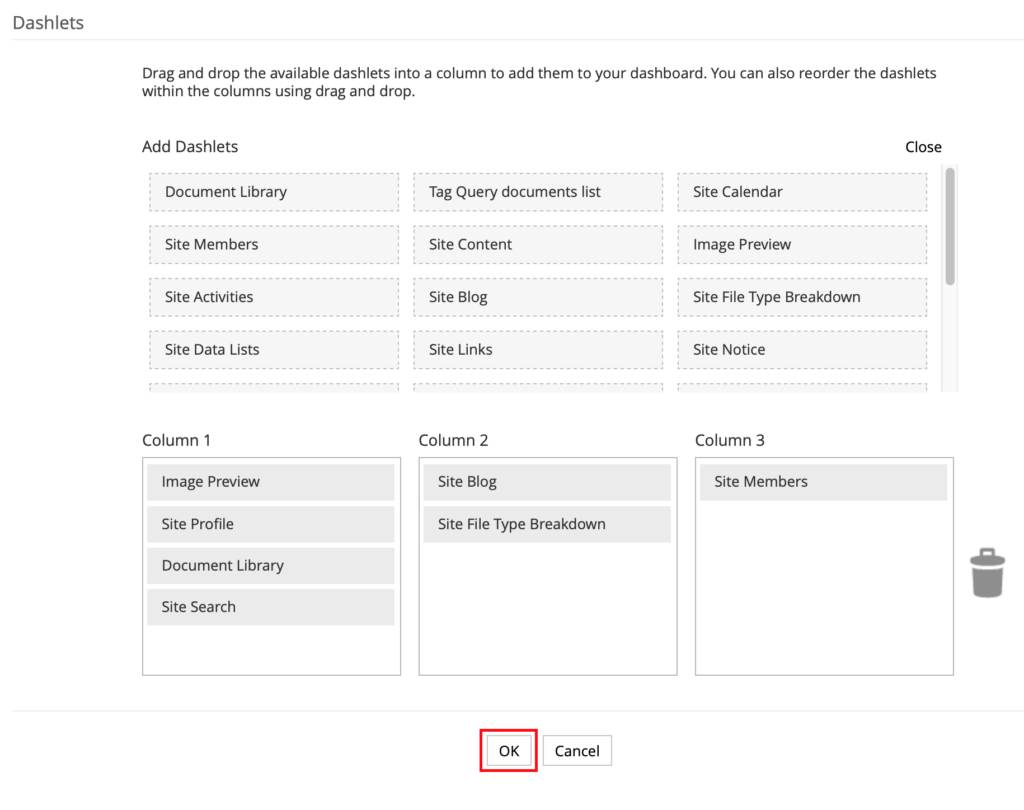
On this page you will need to click ‘Add Dashlets’ and then drag the dashlet called ‘Site Notice’ into one of the columns below and then click ‘Ok’ at the bottom of the page to save your changes.

Next, you will need to upload the image file into the document library. To do this, simply drag and drop the file from your desktop into document library to have the document uploaded.
Now edit the permissions for that file to give Consumer VO and Consumer PDF/Print users, Consumer rights instead (otherwise those users wont be able to see the file outside of the document library) To do this, hover above the file in the document library and click ‘More’ from the menu to the right and then click on ‘Manage Permissions’.
Navigate back to the document library and hover above the image you just uploaded. Click ‘View in browser’ from the menu to the right and copy the URL starting from the / before the word “share”. For example:
/share/proxy/alfresco/api/node/content/workspace/SpacesStore/4ad6d418-518d-4af8-b338-cd0298e13e66/comments.jpg
Now go back to the site dashboard and click on the pencil icon at the top right of the notice dashlet. Now click on ‘< >’ this will open up the HTML editor. Paste the following text into this box editing in your ‘view in browser’ link from before.
<p><img style=”margin: 10px 10px 0px 10px;” src=”VIEW IN BROWSER LINK HERE” alt=”” width=”135″ /></p>
Then click ‘OK’ and ‘OK’ again to save your changes.


